Every feature,
shown on screen
A screenshot of each part of the editor, what it's for, and exactly how to use it — the fastest way to learn Nova Clip. Prefer plain text steps? See the Desktop Manual.
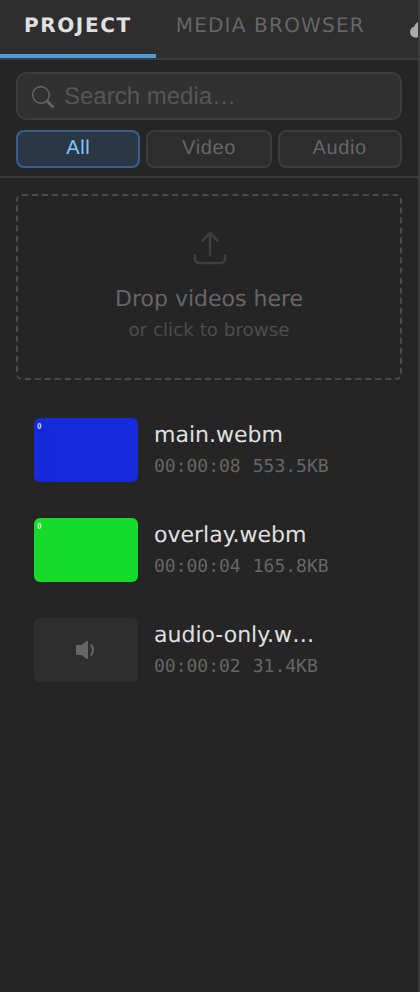
01Import Media
Bring your video and audio files into the project. Nothing is uploaded — everything happens on your device.
How to use
- Drag files onto the Drop videos here box in the Project panel, or click it to browse.
- Switch between All / Video / Audio to filter the list, or use the search box once you have a lot of clips.
- Each imported file shows a thumbnail, its duration and its size — drag one onto the timeline to use it.

02Timeline & Trimming
Arrange, layer and trim your clips across multiple tracks: two video tracks (V1, V2) and an audio track (A1).
How to use
- Clips on V2 draw on top of V1 in the preview — that's how the picture-in-picture overlay above is layered on the main clip.
- Drag a clip to move it; hold Shift while dragging to snap to nearby clip edges.
- Drag the left or right edge of a clip to trim it — the preview updates live.
- Select a clip and press S to split it at the playhead, or Delete to remove it.
- Use the zoom controls (top-left of the timeline) or Ctrl+scroll to zoom in for frame-accurate edits.
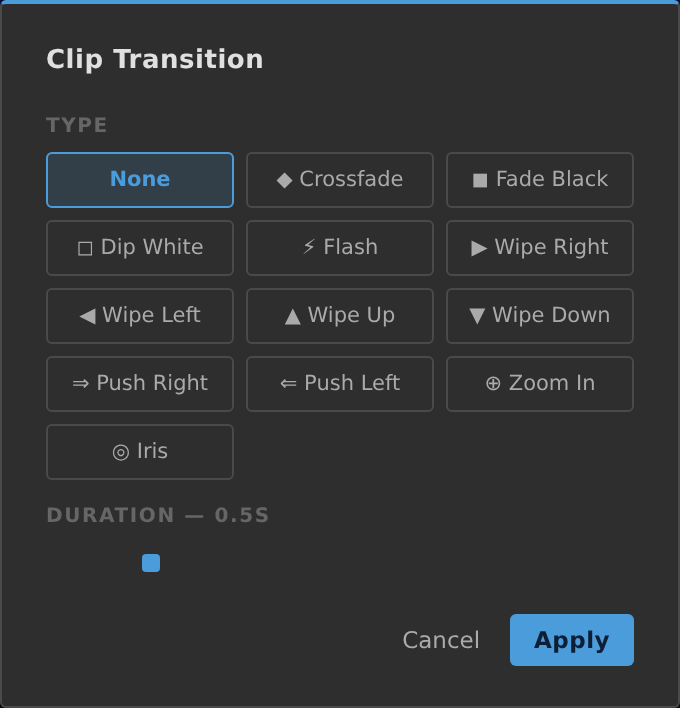
03Transitions
Blend from one clip into the next instead of cutting sharply between them.
How to use
- Where two clips meet on the same track, a small badge appears at the boundary — click it.
- Pick a type: crossfade, fade to black/white, flash, a wipe or push in any direction, zoom in, or iris.
- Drag Duration to set how long it lasts (0.2s–2.0s), then click Apply.
- Click the badge again any time to change or remove the transition.
04Text Overlays & Animations
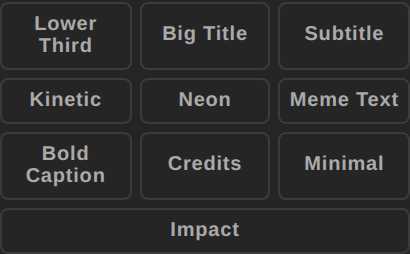
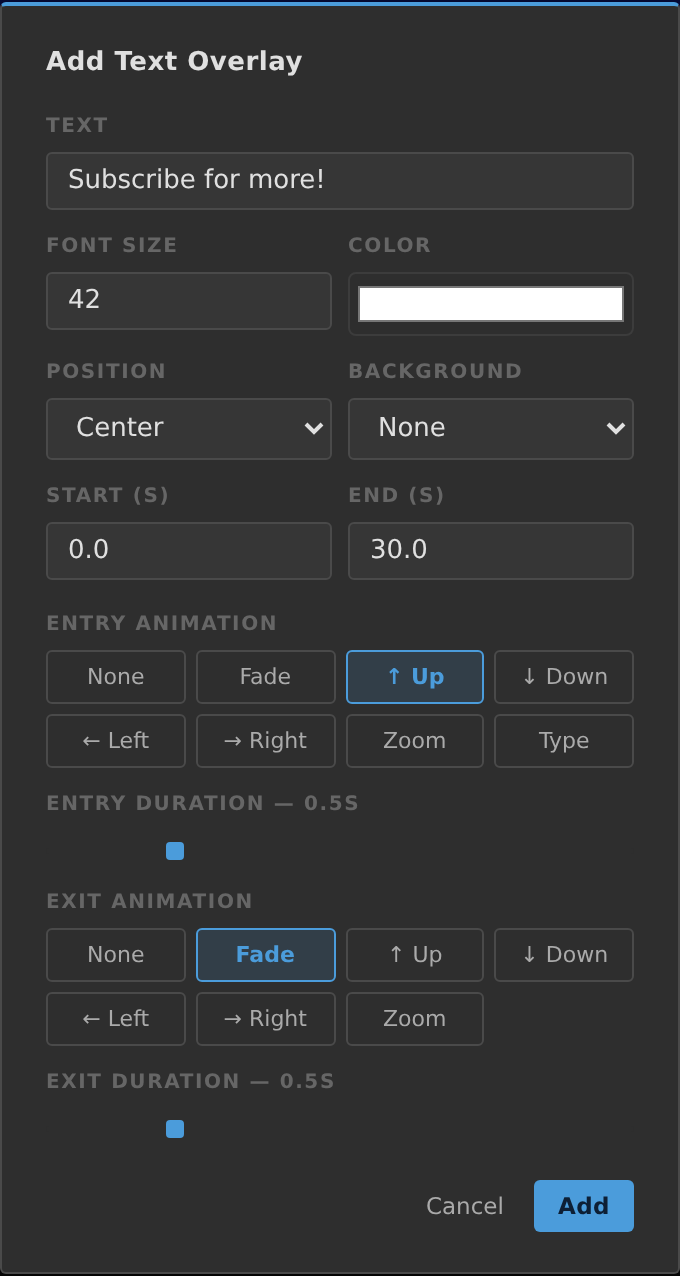
Add titles, captions or lower-thirds with independent entry and exit animations — text can fade or slide in, then fade or slide back out before it disappears, instead of cutting off instantly. Ten ready-made Title Templates set everything up in one click.
How to use
- Click a Title Template — Lower Third, Big Title, Subtitle, Kinetic, Neon, Meme Text, Bold Caption, Credits, Minimal or Impact — to open the text modal pre-filled with its size, color, position and animation, or click + Text to start from scratch.
- Type your text.
- Set Font Size, Color, Position and an optional Background bar.
- Set Start and End times for when it's on screen.
- Pick an Entry Animation (Fade, slide, Zoom or Typewriter) and its duration.
- Pick an Exit Animation separately — it plays over its own duration right before End, so the text can leave the same way (or a different way) than it arrived.
05Stickers
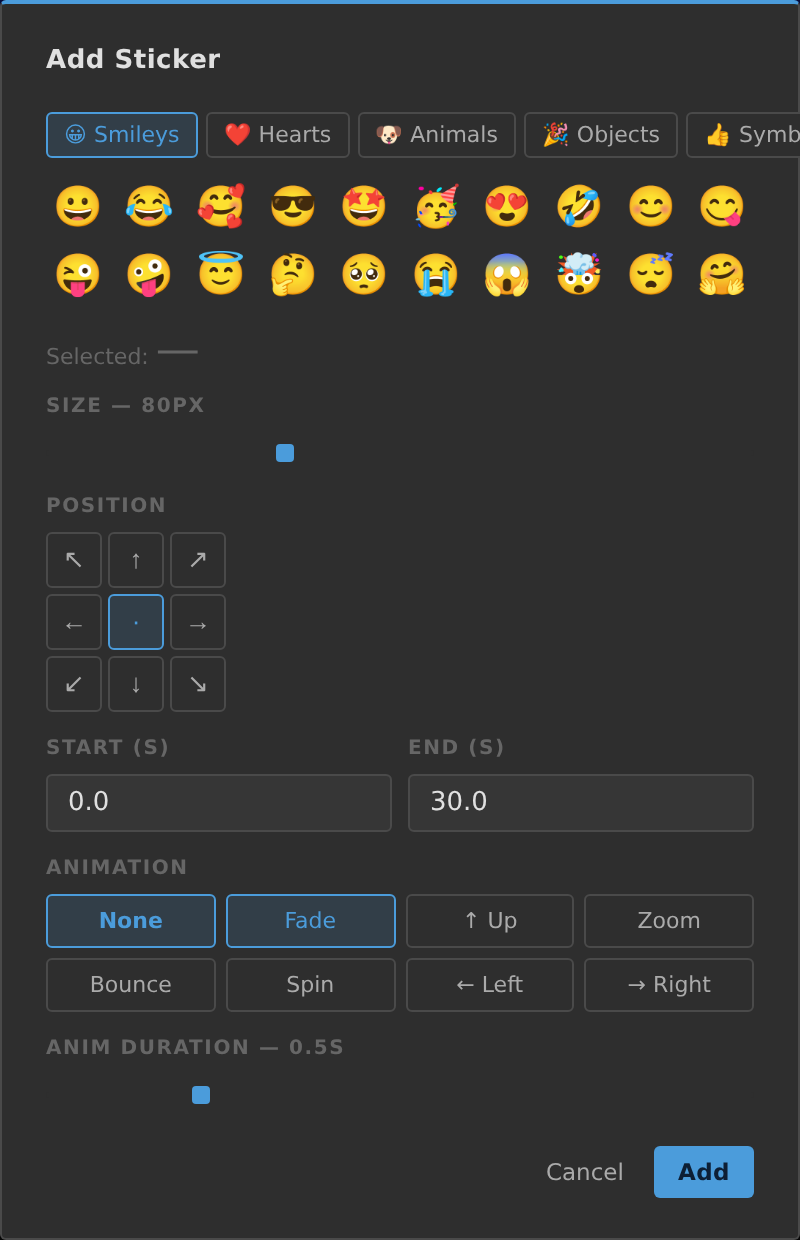
Drop an animated emoji anywhere on the frame — reactions, callouts, or simple decoration.
How to use
- Click + Sticker (or press E) and pick a category — Smileys, Hearts, Animals, Objects and more.
- Choose an emoji, then set its Size and Position on the 9-point grid.
- Set Start/End and an animation — Fade, Zoom, Bounce, Spin or a slide direction.

06Markers
Flag important moments on the timeline — a beat, a cut point, a note to yourself — so you can jump straight back to them.
How to use
- Move the playhead where you want a flag and press M (or click the marker button in the toolbar).
- Alt+click anywhere on the ruler to add one at that exact position.
- Use Shift+← / Shift+→ to jump between markers.
07Auto Caption
Automatically transcribe a clip's speech into timed captions — entirely on-device. Nothing is uploaded, and no account is needed.
How to use
- Select a clip with speech in it, then click Auto Caption.
- The first run downloads a small speech-recognition model (~75MB), cached by your browser after that — every clip after the first transcribes almost instantly.
- Captions are added as individually-editable text overlays, timed to the speech.
.srt or .vtt file instead.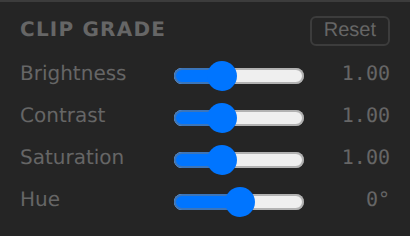
08Clip Grade
A quick, per-clip color adjustment — separate from the full Lumetri grading panel — for when you just need to fix one clip's exposure or color to match its neighbors.
How to use
- Select a clip on the timeline — its properties appear on the right.
- Adjust Brightness, Contrast, Saturation and Hue.
- Click Reset to clear all four back to their defaults.
09Speed Ramp
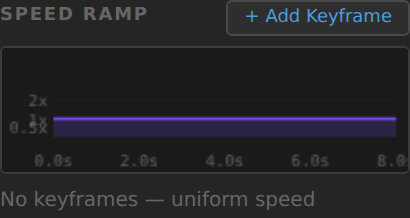
Change a clip's speed over time — ease into slow motion mid-clip, or snap into a timelapse — instead of one flat speed for the whole clip.
How to use
- Select a clip, then click + Add Keyframe on its Speed Ramp graph.
- Drag a keyframe up or down to change the speed at that point in the clip (0.1× to 4×).
- With no keyframes, the clip plays at one uniform speed — set with the Speed dropdown under the preview.
10Picture-in-Picture
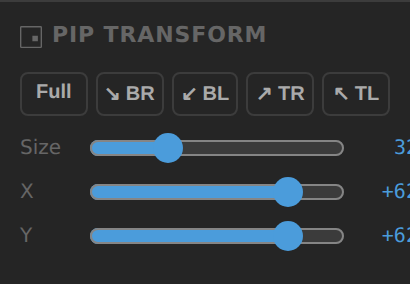
Position and resize a clip on the V2 track as an overlay — a reaction cam, a logo, or a second angle over your main footage.
How to use
- Select a clip that's on V2 (or any track above the main one) — PiP Transform appears in its properties.
- Click a corner preset (Full, or a corner like ↘ BR) for a quick placement.
- Fine-tune with the Size, X and Y sliders.
11Chroma Key (Green Screen)
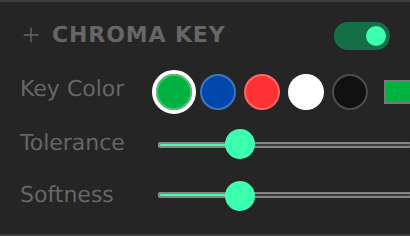
Remove a solid-color background from a clip so whatever's on the track below shows through instead.
How to use
- Place your green/blue-screen clip on a track above your background clip, select it, and turn on Chroma Key.
- Pick your key color from a preset swatch, or use the color picker to sample your exact background.
- Raise Tolerance until the background fully disappears.
- Use Softness to smooth out any hard, jagged edges around the subject.
12Color Wheels
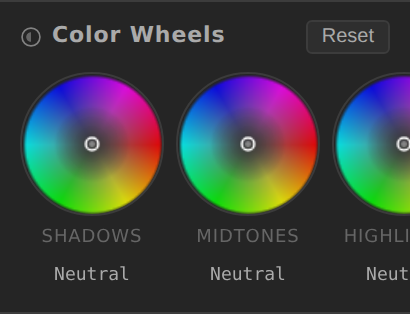
Push color independently into a clip's shadows, midtones and highlights — the same three-way color-correction tool used in professional grading software.
How to use
- Select a clip, then drag the center dot of the Shadows, Midtones or Highlights wheel toward a color.
- The readout below each wheel shows the exact RGB shift being applied.
- Click Reset to bring all three wheels back to neutral.
13Lumetri & Color Match
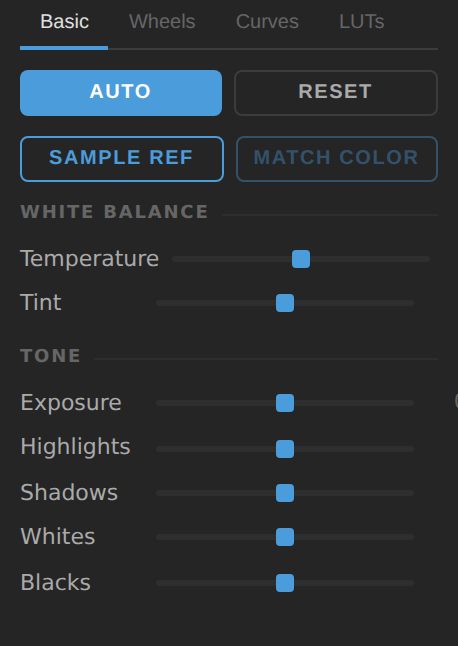
A full grading panel (white balance, exposure, highlights/shadows, whites/blacks) plus Color Match, which copies one clip's color grade onto another in a single click.
How to use
- Open the Lumetri tab in the right-hand panel — its Basic tab has the main tone and white-balance sliders, with Wheels, Curves and LUTs alongside it.
- To match two clips: scrub to a frame with the look you want, press Shift+C (or click SAMPLE REF) to save it as a reference.
- Select the clip you want to grade and press Shift+M (or click MATCH COLOR) — the grade applies instantly.
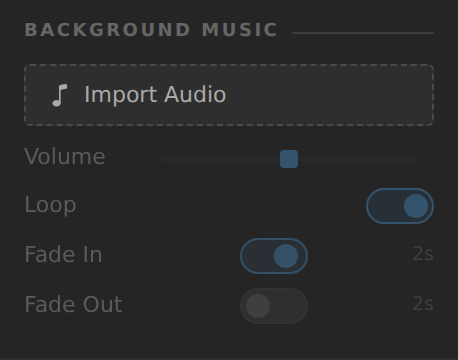
14Background Music
Add one music track that plays underneath your whole project, independent of the clips on the timeline.
How to use
- Click Import Audio under Background Music and choose a file.
- Set its Volume relative to your other audio.
- Turn on Loop if the track is shorter than your project.
- Turn on Fade In / Fade Out for a smooth 2-second entrance and exit.
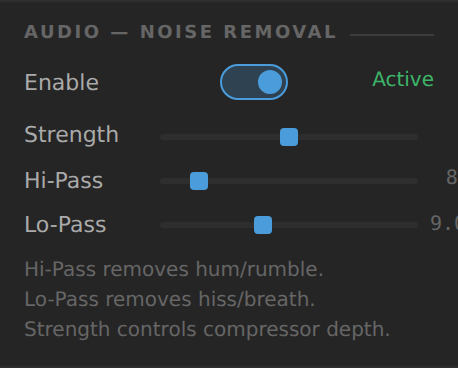
15Noise Removal
Clean up background hum, rumble, hiss or breath noise from a clip's audio.
How to use
- Turn on Enable for the selected clip.
- Raise Hi-Pass to cut low-frequency hum and rumble.
- Lower Lo-Pass to cut high-frequency hiss and breath noise.
- Strength controls how hard the compressor works overall — raise it gradually and listen for artifacts.
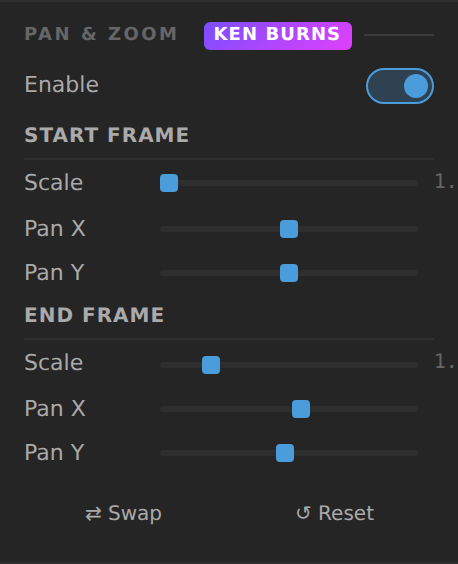
16Pan & Zoom (Ken Burns)
Add slow, cinematic motion to a static clip or photo-like shot by animating between a start and end framing.
How to use
- Select a clip and turn on Pan & Zoom.
- Set the Start Frame's scale and position — where the shot begins.
- Set the End Frame's scale and position — where it ends up.
- Use Swap to reverse the direction, or Reset to start over.
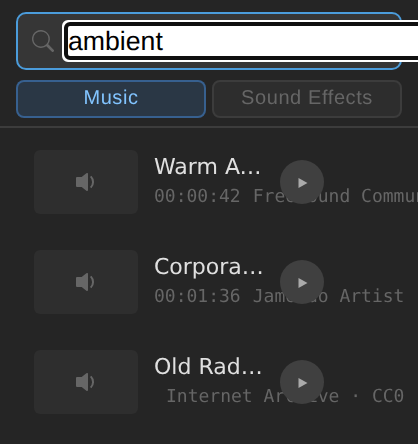
17Media Browser
Search free, CC-licensed background music and sound effects and add them straight into your project — no downloading and re-uploading. Results are pooled from two sources, Openverse and the Internet Archive, so you get more tracks per search.
How to use
- Click the Media Browser tab (next to Project) and type a search term.
- Switch between Music and Sound Effects.
- Click the play icon to preview a track before adding it.
- Click + to import it straight into your project media — each result shows its source and license.
18Canvas Size & Aspect Ratio
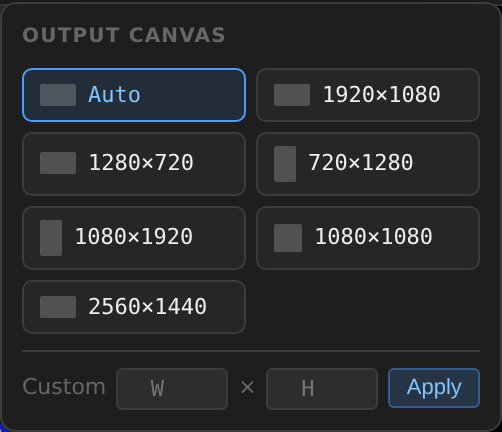
Set the shape of your output — landscape for YouTube, vertical for Reels and Shorts, or square — before you export.
How to use
- Click the canvas-size button in the toolbar.
- Pick a preset — Auto follows your first imported clip, or choose a fixed size like 1080×1920 for vertical.
- Or type an exact Custom width and height and click Apply.
19Export Video
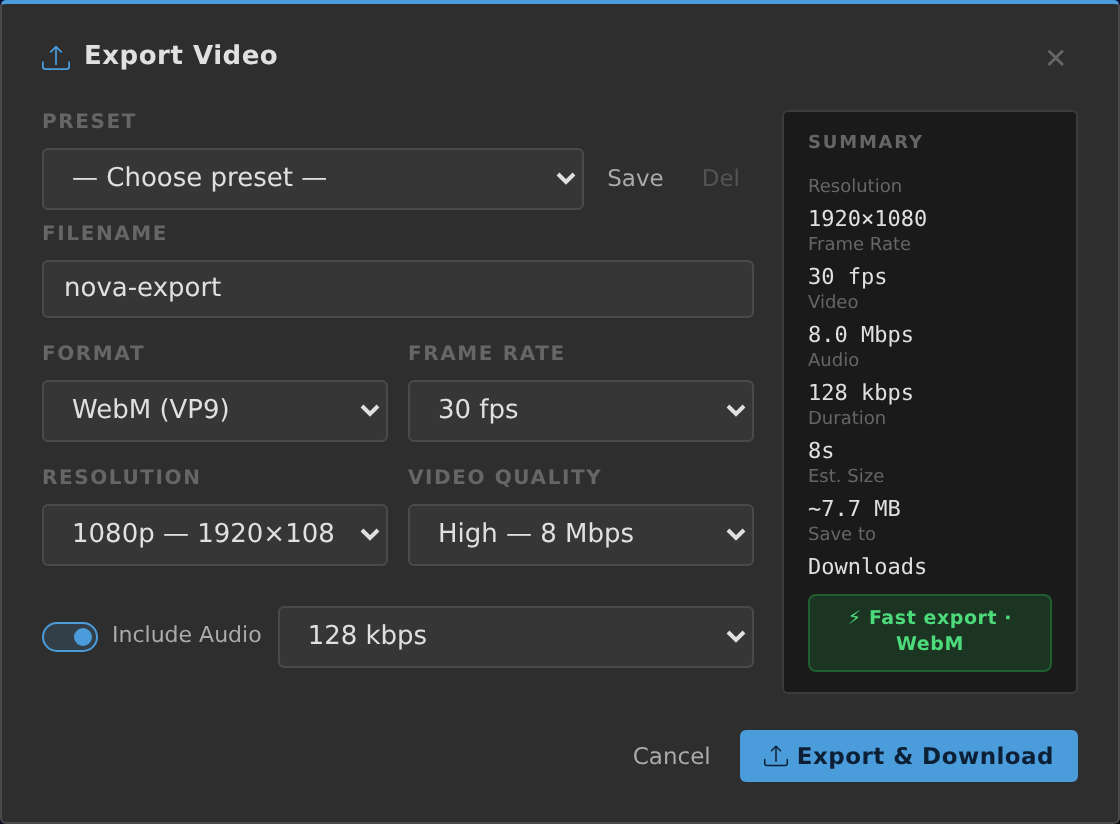
Render your finished timeline to a video file. Rendering happens entirely in your browser — nothing is uploaded.
How to use
- Click Export in the toolbar.
- Choose a Format (WebM or MP4, when your browser can encode it), Resolution and Frame Rate.
- Check the Summary panel for the estimated file size and whether a fast or real-time export will be used.
- Click Export & Download — signing in is only required at this final step, not for editing.
Don't see a feature you need?
Tell us what you're missing and we'll look into adding it.
Contact Us →